Installing Oracle SOA-BPM 11.1.1.3.0 (PS2), Oracle Service Bus (OSB) 11.1.1.3.0 and JDeveloper 11.1.1.3.0 on Windows 7 64Bit
Step 1: Downloading Required Software:-
a) JDK 1.6.18 or higher - 64bit and 32bit both. 32 bit JDK will be required to run JDeveloper.download JDK
You may use JRockit as well.
b) Database (I would use Oracle XE Universal which you may download from here)
c) Weblogic 10.3.3 Generic Installer (jar)
d) OEPE 11.1.1.5.0 or OEPE 11.1.1.6.0 (download OEPE )
e) Repository Creation Utility 11.1.1.3.0
f) Oracle SOA 11.1.1.2.0 (PS1)
g) Oracle SOA 11.1.1.3.0 (PS2)
h) Oracle Service Bus 11.1.1.3.0
i) Oracle JDeveloper Studio 11.1.1.3.0 Generic Installer (jar)
j) Oracle SOA- JDev Extension (Oracle SOA Composite Editor 11.1.1.3.0.25.57)
You may download Oracle Fusion Middleware components from here.
So here is what I have downloaded –

Step 2: Installing Database:-
Run file OracleXEUniv.exe and install the XE database. You may refer the Oracle XE installation guide.
After installing XE, run below commands to meet the requirements of SOA 11g installation -
connect sys/password as sysdba;
alter system set processes=500 scope=spfile;
shutdown immediate;
startup;
Note that SOA requires 300 processes and BAM requires more 100 processes (total 400) which is additional to any other requirement, hence I assigned 500 to processes parameter. In above commands I have assumed that password of “sys” user is “password”.
Step 3: Running RCU to create repository:-
To run RCU, go to rcuHome\BIN and run the file rcu.bat and after that follow below steps -
a) On welcome page click on the "Next" button
b) On “Create Repository” Page select the “Create” radio button.
c) On “Database Connection Details” page provide the database connection related info–

You may be prompted for a version related warning but if you are using XE then you may safely ignore that warning. After successful validation you should see below window –

d) On “Select Components” page chose the prefix and select the components for which you want to create the schema –

e) On “Schema Passwords” page configure the password for the created schemas
f) On “Map Tablespaces” page change anything if you want. I chose the default. After this step required tablespaces will get created in the DB.
g) Now check the summary and click on “Create” button
h) On “Completion Summary” page you should see success status for all the components you chosen –

Step 4: Enable XA support in DB for dev_soainfra schema:-
As in SOA, we frequently use XA, hence it is required to provide transactional management capabilities to SOAINFRA schema. For this grant, please run below SQL commands –
connect sys/password as sysdba;
Grant select on sys.dba_pending_transactions to dev_soainfra;
Grant force any transaction to dev_soainfra;
Step 5: Installing JDK's:-
Now I will install JDK 1.6.21 64bit and I assume that my $middleware_home is E:\ofmw11g\mw, so I will install the JDK under directory E:\ofmw11g\mw\jdk160_21
So after installation, under directory E:\ofmw11g\mw\jdk160_21, you would be able to see below structure –

After installing 64bit JDK, install the 32bit JDK as well at any location. I installed the 32bit JDK in directory E:\ofmw11g\jdk160_18_32bit
We will use this 32 bit JDK for starting JDeveloper as JDev can not be run with 64bit JDK.
Step 6: Installing Weblogic 10.3.3:-
Now we will install Weblogic by running below command from a command prompt –
java -jar wls1033_generic.jar
Make sure that you are using 64bit JDK to run above command.
This command will open up the Weblogic installer GUI –

On “Select Middleware Home” screen, select the radio button “create a new middleware home” and in middleware home path, browse the directory E:\ofmw11g\mw –

On clicking "Next" button it may prompt a warning that middleware home is not empty. Safely ignore that warning.
On “Choose Install Type” page select the “custom” install type.
On “Choose Products and Components” page, select all the components.
Now on “JDK Selection” page, browse to the 64bit JDK we installed.
Now let the default settings remain at next two pages and install the Weblogic.
After successful installation you should see below screen –

Now, under middleware home directory (E:\ofmw11g\mw), you should see below structure -

Step 7: Installing OEPE (Enterprise Pack for Eclipse):-
This is the simplest one. Just unzip the OEPE zip file you downloaded, into the directory - E:\ofmw11g\mw\oepe_11gR1PS2
You should see below content under directory E:\ofmw11g\mw\oepe_11gR1PS2 –

Step 8: Installing SOA 11.1.1.2.0 (PS1):-
Now we have to install Oracle SOA PS1. To start installation, run the setup.exe inside Disk1. Provide the JDK/JRE location as “E:\ofmw11g\mw\jdk160_21” to start installer.
On “welcome” screen click on the next button.
On “Prerequisites Check” screen, make sure that all prerequisite checks gets passed –

On “Specify Installation Location” screen make sure that middleware home path is correct.
On “Installation Summary” screen check the summary and click the “install” button.
You should see below screen on successful installation –

On “Installation Complete” screen review the information and click “Finish” to complete the PS1 installation.
Step 9: Installing SOA and BPM 11.1.1.3.0 (PS2):-
Run the setup.exe inside Disk1 of PS2 installer to start installer GUI.
Follow the same steps as we did in PS1 installation (Step#8) and on successful installation you should see below screen –

Note that PS2 will install Oracle BPM along with SOA suite in your middleware home.
Step 10: Installing OSB 11g:-
To start the installer GUI, go to Disk1 of OSB installer and run setup.exe
Click on the next button on welcome page and select “Custom” on “Select Installation Type” screen.
On “Components to Install” screen, select all the components. All pre-requisites check should be cleared on “Prerequisites Check” screen.
On “Specify Installation Location” screen, make sure that all locations selected are valid. On “Installation Summary” page, review the summary and click on “Install” button.
On successful installation you should see below screen –

Step 11: Installing JDeveloper and JDev SOA Extension:-
To start the installation of JDeveloper, run below command from command prompt –
java -jar jdevstudio11113install.jar
Make sure that you are using 64bit JDK to run above command.
On “Choose Middleware Home” screen select “Use an existing middleware home” and make sure that it is pointing to the middleware home we created earlier.
On “Choose Products and Components” screen select each and every component which is enabled.
On “JDK Selection” screen, select the 64bit JDK which we have installed in our middleware directory.
Click “Next” on rest of the screens and start installation. On successful installation, you should see below screen –

Now go to directory E:\ofmw11g\mw\jdeveloper\jdev\bin and edit file jdev.conf to change the SetJavaHome setting. SetJavaHome should point to the 32bit JDK location –

Now run the E:\ofmw11g\mw\jdeveloper\jdev\bin\jdev.exe to start JDeveloper. Once the JDeveloper IDE gets opened, go to Help --> Check for Updates
It will open up the check for updates wizard. Click on “Next” on the “Welcome” page of the wizard.
Now in “Source” page, select “Install from local file” and browse to the soa-jdev-extension.zip file you downloaded.

Click on “Next” and it should take you to the summary page where it will show you the extension name being installed –

Now click on finish and let the extension get installed. It will ask you to restart JDeveloper. Click on “Yes” and restart the JDeveloper
Now you should be able to create a “SOA Application” in JDeveloper.
Here we are done with installation. Now we will configure a common domain for SOA and OSB.
Step 12: Configuring Domain for SOA, BPM and OSB:-
Run file E:\ofmw11g\mw\wlserver_10.3\common\bin\config.exe to start the Domain Configuration Wizard.
Select the “Create a new Weblogic domain” radio button and then click on “Next”
Now select the desired products for which you want to create the common domain and click on “Next” –

Now specify the Domain Name on the “Specify Domain Name and Location” screen and click on “Next”.

Now configure the administrator Username and Password and click on “Next”.
Now select the server start mode and JDK and click on “Next”
Now configure the JDBC components –

And click on “Next” to get them configured after connection testing.
On “select optional configuration” page select the components which you want to configure. I select all.
Now click on “Next” and configure the resources as you desire. If you do not want to make any change in default configuration settings then keep clicking on “Next” until you reach to the “Configuration Summary” screen –

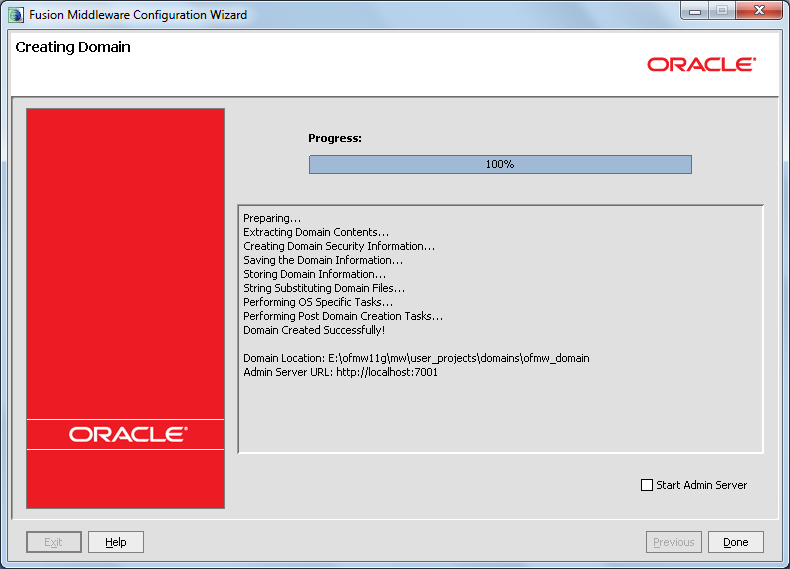
Now click on “Create” to create the domain. Once domain gets created, click on “Done” to exit the wizard-
Now you have a ready to use Oracle SOA-BPM-OSB 11g setup on Windows 7 64Bit operating system.


Hi,
ReplyDeleteFollowed exactly the same steps on starting the Admin Server I am getting the error
Unrecognized option: -jrockit
Error: Could not create the Java Virtual Machine.
Error: A fatal exception has occurred. Program will exit.
Kindly do the needful
Thanks
Guu
Thanks
I really appreciate information shared above. It’s of great help. If someone want to learn Online (Virtual) instructor lead live training in Oracle JDeveloper 11g Fusion, kindly contact us http://www.maxmunus.com/contact
ReplyDeleteMaxMunus Offer World Class Virtual Instructor led training on Oracle JDeveloper 11g Fusion. We have industry expert trainer. We provide Training Material and Software Support. MaxMunus has successfully conducted 100000+ trainings in India, USA, UK, Australlia, Switzerland, Qatar, Saudi Arabia, Bangladesh, Bahrain and UAE etc.
For Demo Contact us.
Nitesh Kumar
MaxMunus
E-mail: nitesh@maxmunus.com
Skype id: nitesh_maxmunus
Ph:(+91) 8553912023
http://www.maxmunus.com/
I really appreciate information shared above. It’s of great help. If someone want to learn Online (Virtual) instructor lead live training in Oracle 11g Fusion Java Programming, kindly contact us http://www.maxmunus.com/contact
ReplyDeleteMaxMunus Offer World Class Virtual Instructor led training on Oracle 11g Fusion Java Programming. We have industry expert trainer. We provide Training Material and Software Support. MaxMunus has successfully conducted 100000+ trainings in India, USA, UK, Australlia, Switzerland, Qatar, Saudi Arabia, Bangladesh, Bahrain and UAE etc.
For Demo Contact us.
Nitesh Kumar
MaxMunus
E-mail: nitesh@maxmunus.com
Skype id: nitesh_maxmunus
Ph:(+91) 8553912023
http://www.maxmunus.com/