Wednesday 31 October 2012

Transaction Processing in BPEL Processes

Closing the Transaction

Just been working with a couple of colleagues on documenting how to migrate transactional processes from WebLogic Integration (WLI) to BPEL and thought I would blog about transaction support in BPEL.  First off there are a couple of contradictory statements that need to be made.
  • BPEL does not have transaction delineation
  • Oracle BPEL Process Manager supports transactions
The first statement relates to the BPEL language which has no way of marking the start or end of XA style transactions, instead it provides semi-automated recovery through the concept of compensation, but more on this in another entry.
The second statement relates to the Oracle implementation of BPEL.  BPEL is inherently a stateful language and the BPEL Process Manager uses XA transactions to manage that state.  It also allows XA transactions to extend beyond the boundaries of the active BPEL process.  In this post I will try to explain a little about how this works.

Transactions Everywhere

Every BPEL process executes in the context of one or more transactions.  When a process starts to execute the process manager does one of two things with transactions;
  1. It starts a new transaction for the process.
  2. It enlists the process in an already open transaction.
BPEL uses this transaction to update process state in the database and also log audit events in the database.  Even if all this is turned off the process manager will still have processes execute in a transaction context.  When invoked through a web service interface BPEL will use the first option as there will not be a transaction context available.  When invoked through the Java API in a transactional environment then the process manager may use either option depending on the parameters used in the call.

Lazy Boy

BPEL will try to squeeze as many activities into a single transaction as it possibly can.  Only a few activities actually cause the process manager to update the process state in the database and commit the transaction.  A given activity does not always cause a transaction to be committed, sometimes the process may keep the same transaction context because of the properties associated with the activity.

Enlisting Support with a Little Participation

When BPEL calls an adapter, the ESB or another process in the same BPEL domain then it has the option to either include the target in the same transaction, or to start a separate transaction.  This behavior is controlled by the “transaction” property in the partner link.  If the “transaction” property value is set to “participate” then the callee is enlisted into the current transaction, if it is unset or set to any other value then the callee executes in a seperate transaction.  This is great for ensuring that several database updates are all included as part of the same transaction, but it does have a downside.  If any of the callees rolls back the exception then the the current BPEL process state is also rolled back to the last commit.  If there has been no commit and this process was invoked through a synchronous interaction then the process will seem to disappear from the face of the earth.  Something to be aware of.  To minimise the impact of this the database adapter will throw an error rather than rollback the transaction if by so doing it would not affect transactional integrity (basically you can do one DB update without rolling back but if you do two then an error will cause a rollback).

Parallel Execution

You might think that a BPEL flow activity would cause a new transaction to be started as this allows several activities to be executed in parallel. However this is not the case as the BPEL Process Manager will try to execute the flows sequentially for efficiency purposes.  Only if some action in the flow would cause a new transaction to be started will the activities execute in parallel.  A common use case for this is when a flow is used to make several synchronous calls.  Normally they would all execute in the same transaction context, however this means that the services are called sequentially, which can add latency to the application.  To avoid this there is another partner link property, “nonBlockingInvoke”, which when set to “true” causes a new thread to be spawned to execute the invoke.  The upshot of this is that a new transaction is started and this allows for true parallelism in the flow.

Lets Talk About Commitment

The general rules about what causes a commit are pretty straightforward, the BPEL process will commit the transaction and start a new one after the following activites
  • receive – unless it is the first receive in the process and the process was called with a “transaction=participate” property (possibly by marking it as such in the partner link) in which case the process participates in the already existing transaction.
  • onMessage
  • wait – for very short waits (up to a couple of seconds) the process manager will not commit the transaction.
  • onAlarm
  • invoke – only if the partner link is non-idempotent (can be marked with the “idempotent” partner link property).
  • End of process flow – only if the process is not participating in the callers transaction (the corollary of the receive).
The table below summarises the transaction status when performing different activities.

Activity

Transaction Status in BPEL Process

Transaction Status in Target Process or Adapter

Receive New Transaction N/A
Receive with Property “transaction=participate” Use Existing Transaction from Caller N/A
Invoke Synchronous Process Use Existing Transaction New Transaction
Invoke Synchronous Process with Partner Link Property “transaction=participate” Use Existing Transaction Use Existing BPEL Transaction
Invoke Synchronous Process with Partner Link Property “idempotent=false” New Transaction New Transaction
Invoke Synchronous Process with Partner Link Property “nonBlockingInvoke=true” New Transaction New Transaction
Invoke Asynchronous Process Use Existing Transaction New Transaction
Invoke Asynchronous Process with Partner Link Property “transaction=participate” Use Existing Transaction New Transaction
Invoke Synchronous Process with Partner Link Property “idempotent=false” New Transaction New Transaction
Wait < a couple of seconds Use Existing Transaction N/A
Wait > a couple of seconds New Transaction N/A
Flow Use Existing Transaction  

Flow

You may be surprised to see flow on the list, and then even more surprised to see that it uses the existing BPEL transaction context.  The reason for this is that the BPEL process manager will try to execute all the flow legs sequentially and so the behavior of the flow will be determined by the activities in the flow rather than the actual flow itself.

How to setup MetaData Store (MDS) for Weblogic 11g in Jdeveloper

How to setup MetaData Store (MDS) for Weblogic 11g in Jdeveloper

SOA Suite 11g has a provision for sharing SOA artifacts through MDS – Meta Data Store. This facilitates greater re-use of SOA artifacts such as XML Schemas, EBMs, WSDLs, Fault Policies, Rule repositories and Service Data Objects (SDOs) among others. MDS can be file-based or database-based. Here are the steps to create and use Databased and file-based MDS in JDeveloper.
MDS is created under <jdeveloper-home>/integration/seed directory. Default folder “soa” is used to store common system soa artifacts. All custom artifacts are supposed to be stored under a folder called “apps”, since this folder already exists in server.
Create directory structure under apps folder. In my case, I’ve created folder structure ../apps/cosdeaia/ApplicationConnectorServiceLibrary to store XML schema files. This ideally should match your schema structure.
1. First you go to your local 11g Jdeveloper installation folder. In my case it is C:\JDEV_HOME11.1.1.3\jdeveloper\integration\ folder (if you have already applied third party plugin patch provided by oracle then you will see seed folder by default with all previous configuration done). If not create a seed folder under integration folder.
2. Now create folder with name apps under seed (remember to create folder with name apps else you might face issue this oracle documents say i didn’t try out).
3. Under apps you can create your folder structure to place all your XSD, WSDL files.
4. We can create a SOA_MDS connection in Jdeveloper as below -
New Connections — > SOA-MDS Connection
5. The SOA-MDS connection can be created in two ways. One is
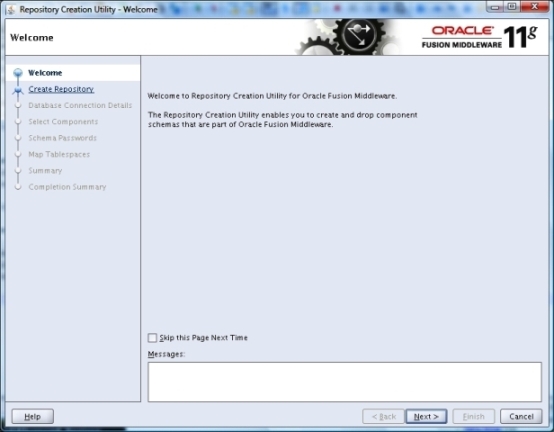
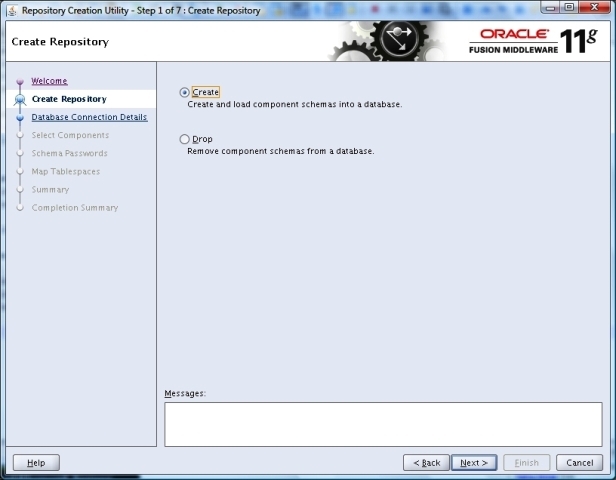
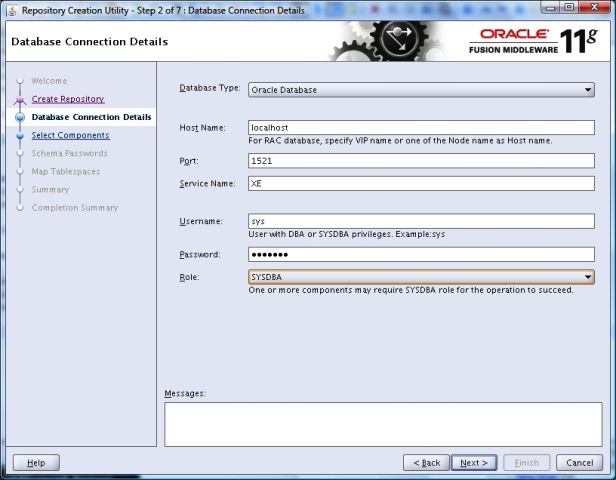
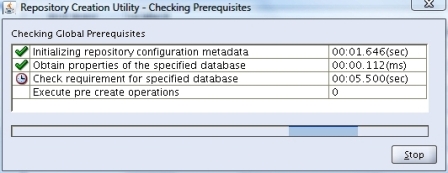
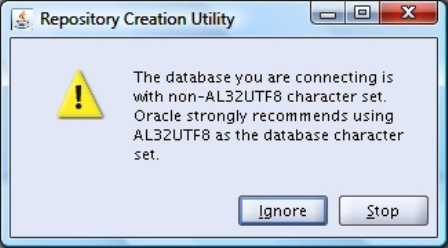
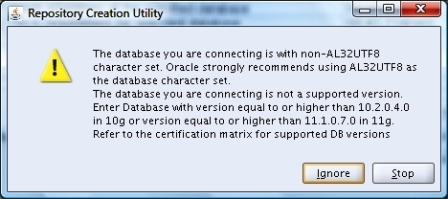
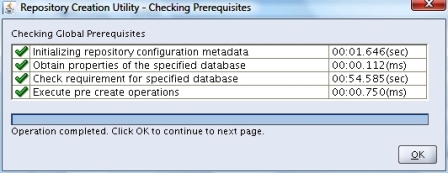
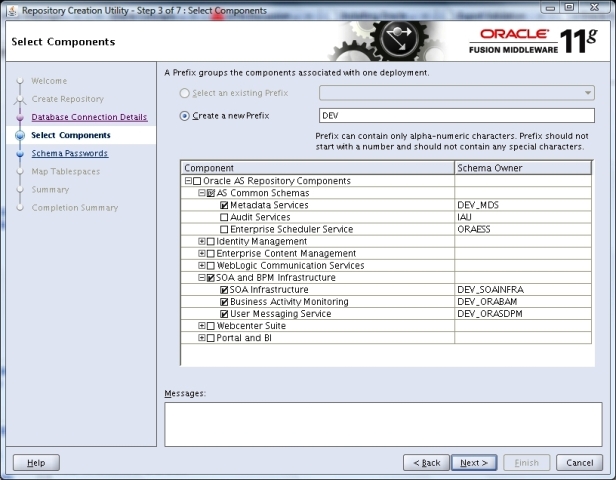
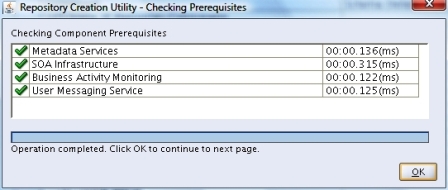
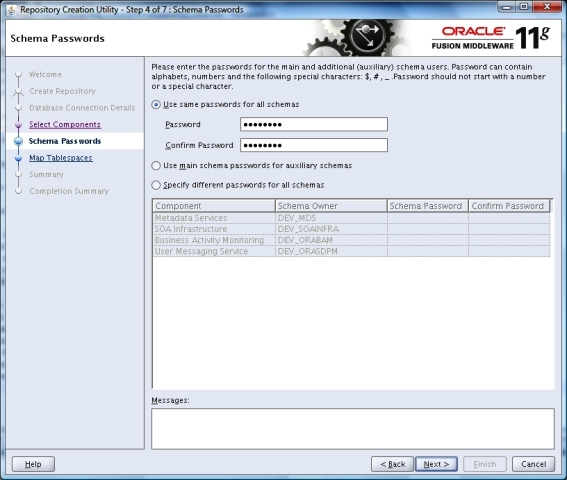
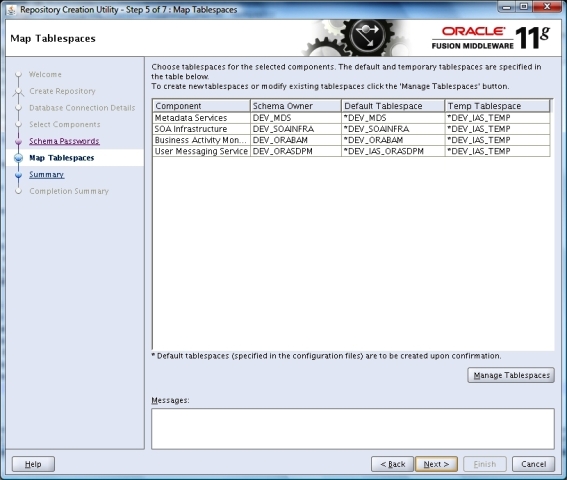
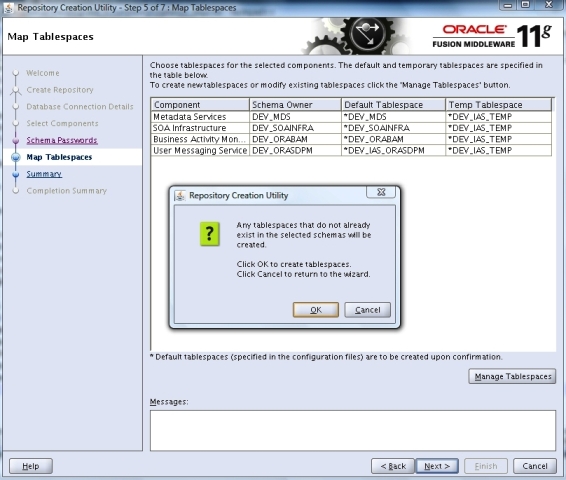
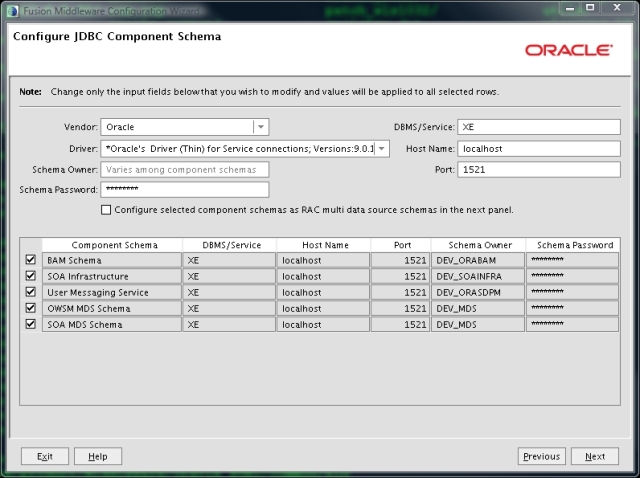
 File Based MDS and other is Data Based MDS.
MDS Setup
6. In Create SOA_MDS Connection window, select File Based MDS as Connection              Type for file based MDS connection, we will point to the local folder in our system               where all the WSDL and XSD files are placed as shown below. So when we use the wsdl         and xsd files in the  project, they will be referred from the local system.
MDS Setup
7. Click OK. Now the File Based MDS connection is created.
8. Lets see how to create DB based MDS connection. In Create SOA_MDS Connection window, select DB Based MDS as Connection Type for file based MDS connection.
9. For DB Based MDS connection, we should have created all the schema for the weblogic in 
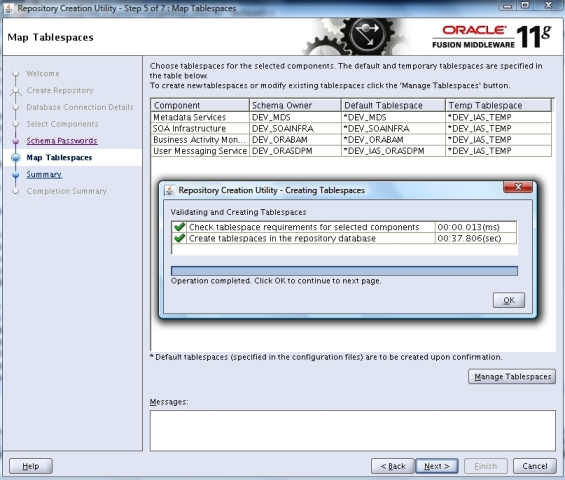
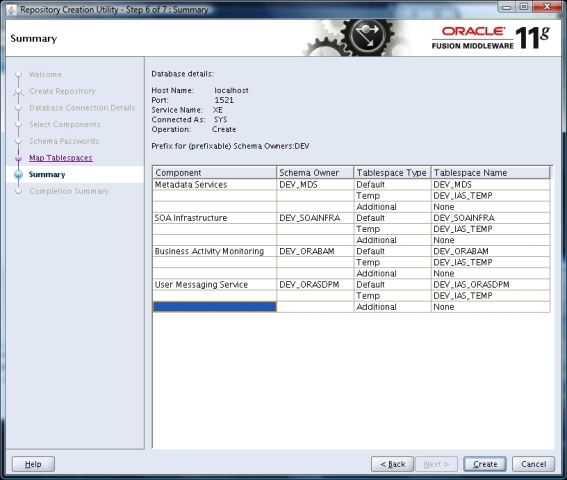
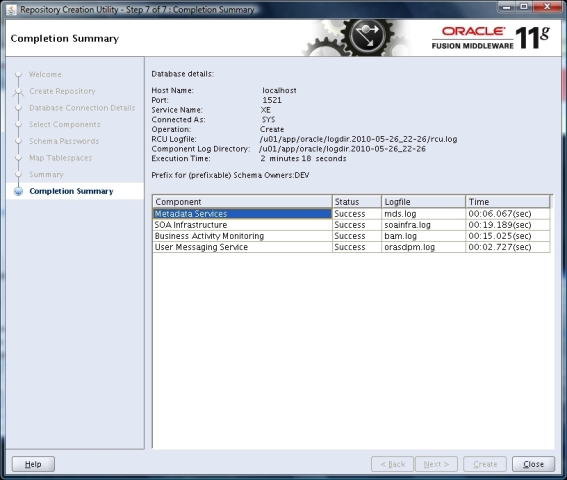
the database by running the Repository Creation Utility (RCU) wizard. After RCU execution, the DEV_MDS schema will get created in the database. We need to use the DEV_MDS schema connection and soa-infra as MDS Partition while creating the DB Based MDS connection as shown in the above screen shot.
10. Click OK. Now the DB Based MDS connection is created.
11. So when we use the wsdl and xsd files in the project, they will be referred from the local system. But when we deploy the application into Weblogic server, the wsdl and xsd file references will be missing. To avoid this we need to use an Ant script and import all the WSDL and XSD files into Weblogic server.
12. You use common sca tool (common-sca-tools.xml) to do it and use Ant target name importCommonServiceArtifactsIntoMds from class files provided by oracle (MDSImportTask).
13. So whenever we made modifications or additions to the WSDL or XSD files, we need to update the Weblogic server. While update, by using an Ant script first delete all the files from Weblogic server and execute re-import Ant script the latest files into Weblogic server.
14. After Import into Weblogic server, you can use the wsdl and xsd files in your project by referring to the Weblogic server through SOA-MDS (Data Based MDS) connection type. But never Copy these files into your project while referring from Weblogic server. By copying this creates a mess in run time. For example while working you do some modifications in the local WSDL and XSD files and you will forgot to update these changes in to Weblogic server.
15. Whenever we refer the WSDL or XSD files from SOA-MDS (Data Based MDS) connection type, the location URL looks like oramds:/apps/cosdeaia/… (In my case the cosdeaia folder contains all my files…)
16. The new connection appears under the “Resource Pallette” window on right side of the Jdeveloper as shown below
Now you have created the MDS connection in Jdeveloper. You can use in in your SOA Composites.

Friday 26 October 2012

Installing Oracle AIA 11g Foundation Pack on Linux 64bit

Installing Oracle AIA 11g Foundation Pack on Linux 64bit

Installation of Oracle Application Intergration Architecture Foundation Pack (AIA) 11g including Oracle SOA Suite 11g with Oracle BAM 11g on Oracle Database XE 10g and Linux 64bit.

Assumptions:
  1. This demo will be performed within VMware image. Personally, I don't recommend to install AIA11g on 32bit OS.
  2. An image: Oracle Enterprise Linux 5U4 (64bit), 4GB of swap and 6GB of RAM, 20GB of disk space.
  3. Oracle Database: Express Edition 10g, only for development purposes and saving resources in vmware env.
  4. Download software from Oracle downlod website and only from Oracle.
  5. SOA 11g R1 Patch Set 1 (11.1.1.2.0) is required for AIA 11gR1.
  6. Use of Service Registry (11gR1) and Enterprise Repository (11gR1) is optional (not covered in this demo).
  7. AIA 11g R1 Certification Matrix is available here.
  8. AIA 11g R1 (software and docs) is available at eDelivery here:
    AIA 11g at eDelivery
  9. This tutorial also covers ORACLE BAM since it is included in SOA Suite 11g

Download software and place it into /home/oracle/stage directory: Database
If you don't already have an Oracle database installed, choose Oracle Express Edition for a small footprint database. (Oracle XE is suitable for development only. Ignore the warning during installation about the database version as that pertains to production installations.)


Oracle Database 10g Release 2 (10.2.0.1) Express Edition for Linux x86

http://www.oracle.com/technology/software/products/database/xe/htdocs/102xelinsoft.html

Oracle WebLogic Server 11gR1 (10.3.2) 64bit - Package Installer  (Additional Platforms, file: wls1032_generic.jar)
http://www.oracle.com/technology/software/products/ias/htdocs/wls_main.html

Repository Creation Utility (11.1.1.2.1)
http://www.oracle.com/technology/software/products/middleware/htdocs/fmw_11_download.html

SOA Suite 11.1.1.2.0 Generic: 1.7 GB (Nov-2009)
http://www.oracle.com/technology/software/products/middleware/htdocs/fmw_11_download.html

Oracle AIA 11gR1 (11.1.1.2.0) Linux x86 V20956-01.zip
http://edelivery.oracle.com
  • Let's roll:
Install the following software in the order it is shown.
  1. Install oracle database (Oracle XE 10g only for DEV)
  2. Install WebLogic Server 10.3.2
  3. Execute Repository Creation Utility
  4. Install SOA Suite 11g
  5. Install AIA 11g
  6. Uninstall AIA 11g
1. Install Oracle Database

Make sure that hostname is being set properly; if not - configure /etc/hosts:

[root@hostname ~]# cat /etc/hosts
10.0.0.10 yourhostname.local yourhostname
  • Installing oracle xe:
[root@hostname ~]# rpm -ivh /mnt/repository/stage/oracle/Oracle11GDB/oracle-xe-10.2.0.1-1.0.i386\(2\).rpm
[root@hostname ~]# /etc/init.d/oracle-xe configure
 
Oracle Database 10g Express Edition Configuration
-------------------------------------------------
This will configure on-boot properties of Oracle Database 10g Express
Edition.  The following questions will determine whether the database should
be starting upon system boot, the ports it will use, and the passwords that
will be used for database accounts.  Press <Enter> to accept the defaults.
Ctrl-C will abort.
 
Specify the HTTP port that will be used for Oracle Application Express [8080]:
 
Specify a port that will be used for the database listener [1521]:
 
Specify a password to be used for database accounts.  Note that the same
password will be used for SYS and SYSTEM.  Oracle recommends the use of
different passwords for each database account.  This can be done after
initial configuration: *****
Confirm the password:*****
 
Do you want Oracle Database 10g Express Edition to be started on boot (y/n) [y]:y
 
Starting Oracle Net Listener...Done
Configuring Database...Done
Starting Oracle Database 10g Express Edition Instance...Done
Installation Completed Successfully.
To access the Database Home Page go to "http://127.0.0.1:8080/apex"
  • To start/stop the database manually:
[oracle@hostname ~]$ /usr/lib/oracle/xe/app/oracle/product/10.2.0/server/config/scripts/startdb.sh
[oracle@hostname ~]$ /usr/lib/oracle/xe/app/oracle/product/10.2.0/server/config/scripts/stopdb.sh
  • To start the SQL*Plus console (GUI in Gnome)
TIP: Start xserver  and create launcher on your desktop (Gnome):
Launcher's path: /usr/lib/oracle/xe/app/oracle/product/10.2.0/server/config/scripts/runsqlplus.sh

Configure database:

Below setting will prevent from error RCU-6083 during the Repository Creation.
DB Init Param Prerequisite failure for: processes Required Value = 200, Current Value = 40 ...

Run SQL*Plus and connect as SYSDBA

[oracle@hostname ~]$ /usr/lib/oracle/xe/app/oracle/product/10.2.0/server/config/scripts/sqlplus.sh
SQL*Plus: Release 10.2.0.1.0 - Production on Sun Jun 12 22:18:13 2010
Copyright (c) 1982, 2005, Oracle.  All rights reserved.
 
SQL> connect / as sysdba
Connected.
SQL> alter system set processes=200 scope=spfile;
SQL> startup force
ORACLE instance started.
 
Total System Global Area  805306368 bytes
Fixed Size                  1261444 bytes
Variable Size             213909628 bytes
Database Buffers          587202560 bytes
Redo Buffers                2932736 bytes
Database mounted.
Database opened.
SQL>

2. Install WebLogic Server 10.3.2
Before we start, java jdk must be installed.
Download JDK from here jdk-6u20-linux-x64-rpm.bin (http://java.sun.com/javase/downloads/widget/jdk6.jsp)
Install jdk-6u20-linux-x64:
[oracle@hostname ~]$ su -
[root@hostname ~]# chmod +x jdk-6u20-linux-x64-rpm.bin
[root@hostname ~]# ./jdk-6u20-linux-x64-rpm.bin
[root@hostname ~]# exit

Run WebLogic Installer
[oracle@hostname ~]$ cd /home/oracle/stage/SOASuite
[oracle@hostname SOASuite]$ ls -la
-rw-r--r-- 1 oracle oinstall 945517652 Jun 12 13:15 wls1032_generic.jar
[oracle@hostname SOASuite]$ /usr/java/jdk1.6.0_20/bin/java -d64 -jar wls1032_generic.jar
 

wls5_64bit


3. Execute Repository Creation Utility


[oracle@hostname SOASuite]$ unzip ofm_rcu_linux_11.1.1.2.1_disk1_1of1.zip
[oracle@hostname SOASuite]$ cd rcuHome/bin
[oracle@hostname bin]$ ./rcu


4. Install SOA Suite 11g

Run The Oracle Installer to install SOA Suite 11g

[oracle@hostname ~]$ cd /home/oracle/stage
[oracle@hostname stage]$ unzip ofm_soa_generic_11.1.1.2.0_disk1_1of1.zip -d soa11g
[oracle@hostname ~]$ cd /home/oracle/stage/soa11g/Disk1
[oracle@Disk1]$ ./runInstaller
Starting Oracle Universal Installer...
...
Please specify JRE/JDK location ( Ex. /home/jre ), <location>/bin/java should exist :
 
Specify the following path: /usr/java/jdk1.6.0_20 and hit enter;


Configure SOA Suite (including BAM) by creating domains - Administration and Managed Server in WebLogic

[oracle@host bin]$ cd /u01/app/oracle/product/Middleware/Oracle_SOA1/common/bin/
[oracle@host bin]$ ./config.sh


Start Administration & Managed Server (soa_server1, bam_server1) for SOA 11g R1

  • Manual Start: Admin Server
[oracle@hostname ~]$ export SOA_HOME=/u01/app/oracle/product/Middleware
[oracle@hostname ~]$ $SOA_HOME/user_projects/domains/soa_domain/bin/startWebLogic.sh
  • Starting SOA Server
[oracle@hostname ~]$ $SOA_HOME/user_projects/domains/soa_domain/bin/startManagedWebLogic.sh soa_server1
  • Starting BAM Server (optional, don't start for AIA installation - it saves system resources)
[oracle@hostname ~]$ $SOA_HOME/user_projects/domains/soa_domain/bin/startManagedWebLogic.sh bam_server1

TIP: In order to make your servers starting without asking for the usename and the password create security directory and boot.properties file in each of these directories:

[oracle@hostname ~]$ export SOA_HOME=/u01/app/oracle/product/Middleware
[oracle@hostname ~]$ mkdir -p $SOA_HOME/user_projects/domains/soa_domain/servers/soa_server1/security
[oracle@hostname ~]$ mkdir -p $SOA_HOME/user_projects/domains/soa_domain/servers/bam_server1/security
 
[oracle@hostname ~]$ touch $SOA_HOME/user_projects/domains/soa_domain/servers/soa_server1/security/boot.properties
[oracle@hostname ~]$ touch $SOA_HOME/user_projects/domains/soa_domain/servers/bam_server1/security/boot.properties

Fill in all boot.properties files with appropriate entries; username and password:
username=weblogic
password=secret_password
Validate the installation; login to weblogic dashboards:
  • http://hostname:7001/
  • http://hostname:7001/em/
  • http://hostname:7001/console/
  • http://hostname:9001/OracleBAM (Sorry folks, Internet Explorer only)


5. Install AIA 11g

Before we launch the AIA Installer we need to configure some settings.
  • To configure JVM parameters:
Navigate to <Middleware home>/user_projects/domains/<domain_name>/bin. In Linux update the following parameters in the setDomainEnv.sh file. Search for the string USER_MEM_ARGS and modify as necessary.

[oracle@hostname ~]$ vi /u01/app/oracle/product/Middleware/user_projects/domains/soa_domain/bin/setDomainEnv.sh
 
#ADD THIS LINE
USER_MEM_ARGS="-Xms2048m -Xmx2048m -XX:PermSize=256m -XX:MaxPermSize=512m -XX:AppendRatio=3 -XX:NewSize=1228m -XX:MaxNewSize=1228m -XX:SurvivorRatio=10"
 
Next, search for WLS_JDBC_REMOTE_ENABLED="-Dweblogic.jdbc.remoteEnabled=false" - set it to "true" and save changes.
  • Increasing Memory to avoid Compilation Errors
To avoid out-of-memory errors during compilation of a SOA composite application, you need to increase the following memory settings.

To increase memory settings:
open the ant-sca-compile.xml file in the SOA_HOME/bin directory.
[oracle@hostname ~]$ vi /u01/app/oracle/product/Middleware/Oracle_SOA1/bin/ant-sca-compile.xml
 
#Under the scac element, increase the following memory settings
 
<jvmarg value="-Xms2048m"/>
<jvmarg value="-Xmx2048m"/>
<jvmarg value="-XX:PermSize=32m"/>
<jvmarg value="-XX:MaxPermSize=256m"/>

Restart Admin Server or entire SOA infrastructure and we are ready to run the AIA installer.
  • Make sure that Node Manager is up and running.
To check this open WebLogic Server Administration Console and  navigate to Environment > Machines > LocalMachine > Tab: Monitoring > Tab: Node Manager Status

We should see - Status: Reachable and Version: 10.3

Otherwise start it up manually by issuing the following command:

[oracle@hostname ~]$ cd /u01/app/oracle/product/Middleware/wlserver_10.3/server/bin/
[oracle@uranus bin]$ ./startNodeManager.sh

TIP: Ensuring Correct Settings for Node Manager Startup
To ensure correct settings for Node manager startup:
  1. Navigate to the $MW_HOME/wlserver_10.3/common/nodemanager.
  2. Open the nodemanager.properties file and verify the value for StartScriptEnabled=true
  3. If you changed the above value, restart Node Manager by navigating to $MW_HOME/wlserver_10.3/server/bin and using the appropriate commands.
  4. While starting the node manager, ensure that you set the listen address different from "localhost". It is preferred to give the fully qualified name of the machine or the IP address.
Temporary change on jdk home in order to avoid errors during AIA installation; do it as a root user:
[root@hostname ~]$ chown oracle:oinstall -R /usr/java/jdk1.6.0_20

RUN THE AIA 11g INSTALLER

[oracle@hostname ~]$ cd /home/oracle/stage
[oracle@hostname ~]$ unzip Oracle\ AIA\ 11gR1\ \(11.1.1.2.0\)\ Linux\ x86\ V20956-01.zip -d AIA11g
[oracle@hostname ~]$ cd /home/oracle/stage/AIA11g/cd/Disk1/
[oracle@hostname ~]$ ./runInstaller
 
Specify the following path and hit enter:  /usr/java/jdk1.6.0_20


We are done with AIA 11g installation!

Rollback temporary changes on jdk home (as root user):


[root@hostname ~]$ chown root:root -R /usr/java/jdk1.6.0_20

Validate AIA installation. Navigate to the AIA Console http://<server name>:<port number>/AIA/
  • http://hostname:8001/AIA (dont' forget to open ports on firewall)


SOA SUITE URLs:
  • http://hostname:7001/
  • http://hostname:7001/em/
  • http://hostname:7001/console/
  • http://hostname:9001/OracleBAM (Sorry folks, Internet Explorer only!)
  • http://hostname:8001/AIA

6. Uninstalling AIA 11g
1.
In order to uninstall AIA 11g (3.0) navigate to $AIA_HOME oui/bin directory and run the installer with uninstall flag:

[oracle@host bin]$ cd /u01/app/oracle/product/Middleware/AIA30/oui/bin/
[oracle@host bin]$ ./runInstaller.sh -deinstall
Starting Oracle Universal Installer...
- Follow the installer to uninstall AIA application from the server.
2. Login to Enterprise Manager 11g Fusion Middleware Control ( http://hostname:7001/em ) and undeploy all "AIA..." components.


3. Next, clean the database.

- Shutdown WebLogic Server
- drop AIA schemas within the database:

SQL> DROP user "AIA_AIA" CASCADE;
SQL> DROP user "AIA_AIALIFECYCLE" CASCADE;
SQL> DROP user "AIA_JMSUSER" CASCADE;
SQL> DROP user "AIA_XREF" CASCADE;
5. Delete $AIA_HOME directory if the installer didn't do it.

[oracle@host bin]$ rm -rf /u01/app/oracle/product/Middleware/AIA30

xslt padding with characters call template for left pad and right pad

  Could a call-template be written that took two parameters ?   a string, and a   number) return the string with empty spaces appended t...