SOA 11g AQ Adapters
Details AQ at Oracle.com
Database aq table and queue creation |
CONNECT sys/change_on_install as sysdba

DROP USER aq_user CASCADE;

CREATE USER aq_user IDENTIFIED BY aq_user
  DEFAULT TABLESPACE users
  TEMPORARY TABLESPACE temp;

ALTER USER aq_user QUOTA UNLIMITED ON users;

GRANT aq_administrator_role TO aq_user;
GRANT connect               TO aq_user;
GRANT create type           TO aq_user;
GRANT create sequence       TO aq_user;

EXECUTE dbms_aqadm.grant_type_access('aq_user');

-- Login as AQ_User
CONNECT aq_user/aq_user

CREATE TYPE message_type AS OBJECT (
    message_id     NUMBER(15)
  , subject        VARCHAR2(100)
  , text           VARCHAR2(100)
  , dollar_value   NUMBER(4,2)
)
/
BEGIN

   -- ----------------------------------------------------

    DBMS_AQADM.CREATE_QUEUE_TABLE (
        queue_table         => 'aq_user.msg_qt'
      , queue_payload_type  => 'aq_user.message_type'
    );

    -- ----------------------------------------------------

    DBMS_AQADM.CREATE_QUEUE (
        queue_name          => 'msg_queue'
      , queue_table         => 'aq_user.msg_qt'
      , queue_type          => DBMS_AQADM.NORMAL_QUEUE
      , max_retries         => 0
      , retry_delay         => 0
      , retention_time      => 1209600
      , dependency_tracking => FALSE
      , comment             => 'Test Object Type Queue'
      , auto_commit         => FALSE
    );

    -- ----------------------------------------------------

    DBMS_AQADM.START_QUEUE('msg_queue');

    -- ----------------------------------------------------

END;
/
--To Stop and Drop the Queue
CONNECT aq_user/aq_user

EXECUTE dbms_aqadm.stop_queue(queue_name => 'aq_user.msg_queue');
EXECUTE dbms_aqadm.drop_queue(queue_name => 'aq_user.msg_queue');
EXECUTE
dbms_aqadm.drop_queue_table(queue_table => 'aq_user.msg_qt');

DROP TYPE aq_user.message_type;
Weblogic configuring aq adapter |

Create JDBC Datasource localhost-aq whose JNDI name is jndi/localhost-aq
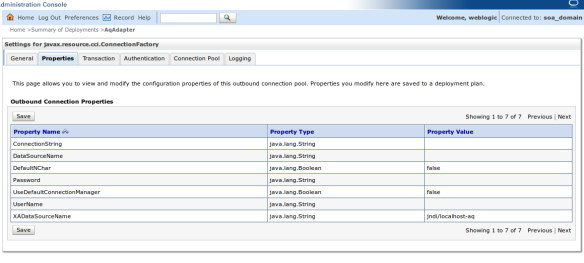
Under Deployments select AQAdapter , Configurations Tab and Outbound Connection , Create a new Outbound Connection eis/aq/localhost-aq whose XADataSourceName is jndi/localhost-aq
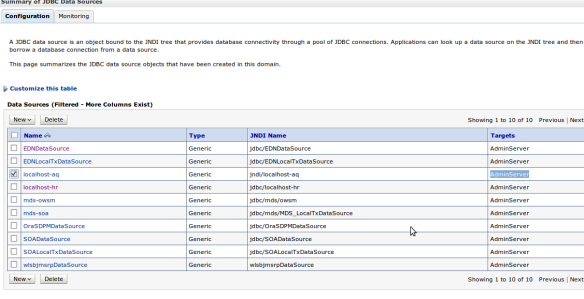
Below are Datasource details to aq_user user in database

This will be deployed on Admin Server , as my SOA installation is running on Admin server

Save

Update the AQAdapter Deployment , Update the plan , no restart needed.
SOA 11g BPEL process using enqueue |
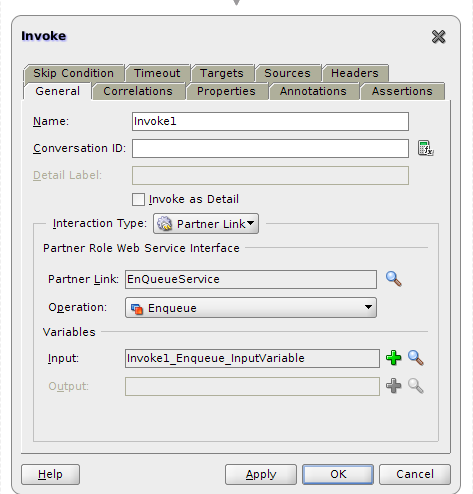
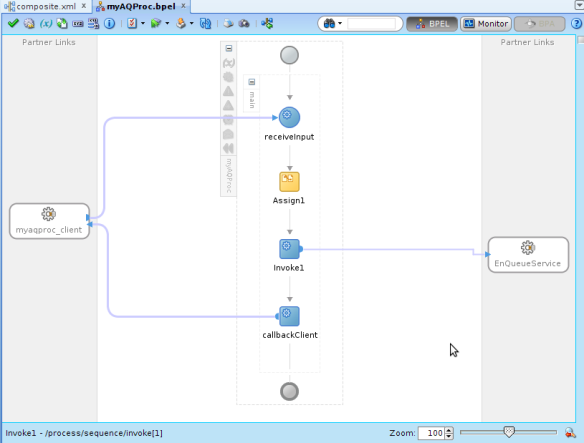
Edit the BPEL Process use Invoke activity to connect to AQ Adapter
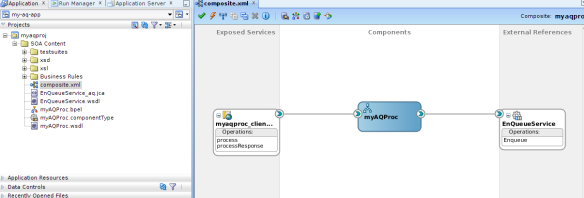
This is how the BPEL would look like
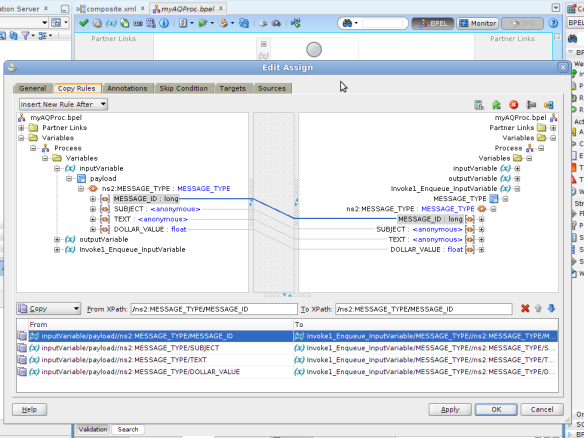
Add assign before invoke to wire input variables to AQ input variables.
These are Details of AQ Adapter

Create a DB Connection by name localhost-aq

Note JNDI name should match to the one that we configured in the Weblogic Console

Select Enqueue operation

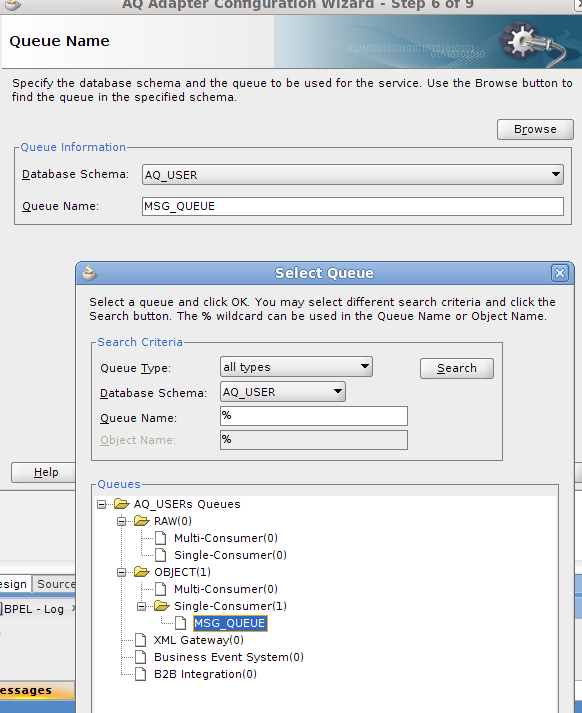
Select the DB Schema as AQ_USER , click on Browse button and select MSG_QUEUE as Queue Name
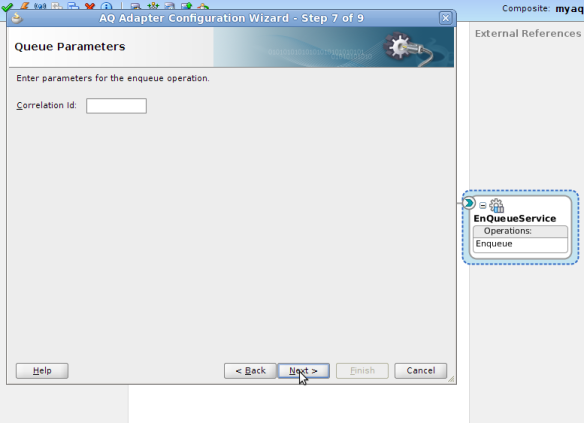
Leave Correlation Id as blank
Select Object Payload as Whole MESSAGE_TYPE

Save, Deploy and Test , You can see the Data being Written to Queue Table under AQ_USER.
SOA 11g bpel process using dequeue |

The BPEL process is Mediator Driven one that has Dequeue inserted into Exposed Services side of composite.

Details of Dequeue configuration , Connect to DB

Select Dequeue operation
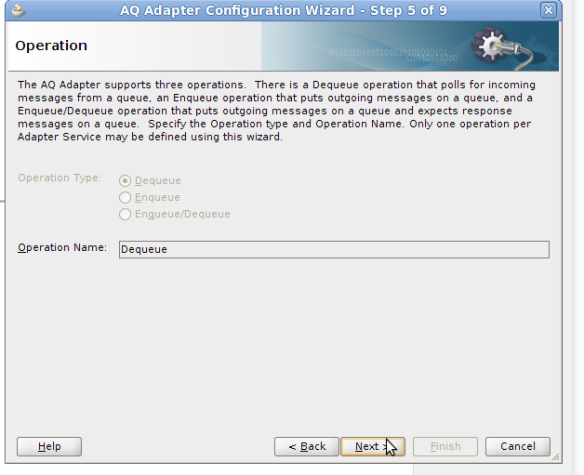
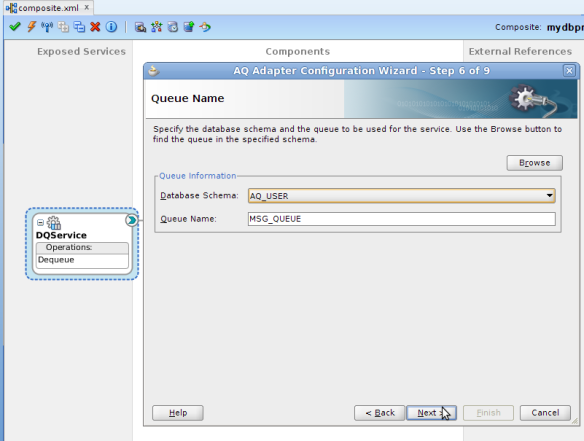
Select AQ_USER as schema and MSG_QUEUE as Queue name using Browse Operation
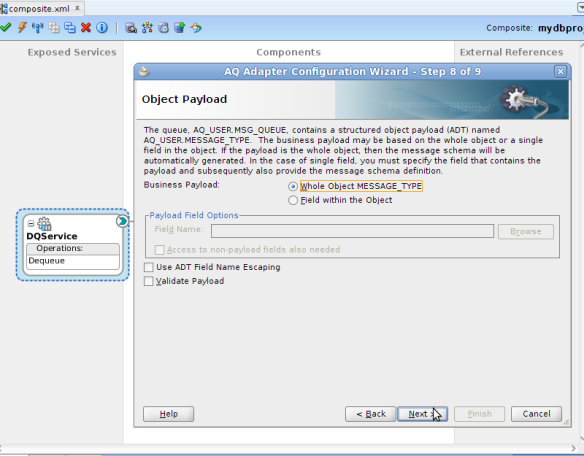
Select MESSAGE_TYPE
Edit the Mediator that connects the Dequeue and File Adapter, create new tranformation
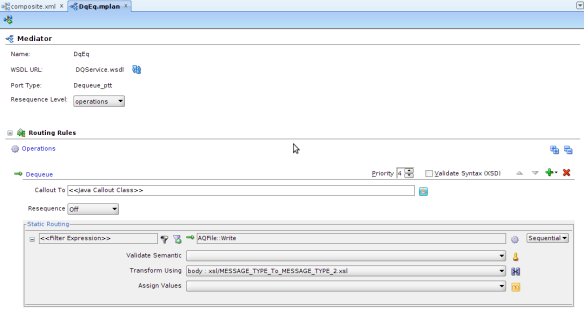
Assign variables in the XML transformation
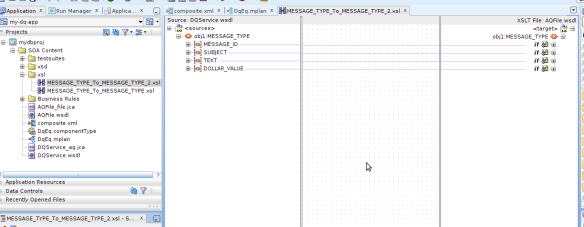
Save, Deploy the Process and Test , the new message should be written into File system under /tmp folder with the filename given during Adapter configuration
TESTING PROCESS END TO END |

Once the process is executed data is written into MSQ_QUEUE table under USER_DATA column

The 2nd BPEL Process Dequeues this message and through Mediator and File adapter writes into a File under /tmp folder


Gr8 post sir !!!!.....
ReplyDeletecould you please provide,the screen shots for Database aq table and queue creation .
Thanks and Regards